Table of Contents
What Actually Happens During Crawl Space Encapsulation
If you’re planning to encapsulate your crawl space before summer humidity peaks in the Triangle, you probably have a clear sense of what the end result looks like: sealed vents, a heavy liner on the floor and walls, a dehumidifier holding the space at 50–55% RH. What’s less clear is what happens between the crew arriving and the job being done.
The process matters because shortcuts in any step undermine everything that follows. A vapor barrier installed over unaddressed moisture, poorly lapped seams, or a dehumidifier with no gravity drain will fail to deliver the stable conditions the system promises. Here is how encapsulation is done correctly, step by step.
Step 1 — Assessment and Diagnostic Baseline
Before any material goes into the crawl space, the space is measured and evaluated. A thorough assessment covers:
- Current humidity and temperature: a baseline reading establishes what the space is doing now, which informs dehumidifier sizing and confirms the encapsulation scope
- Moisture sources: whether moisture is primarily from ground evaporation, condensation on surfaces, or water intrusion (these have different solutions)
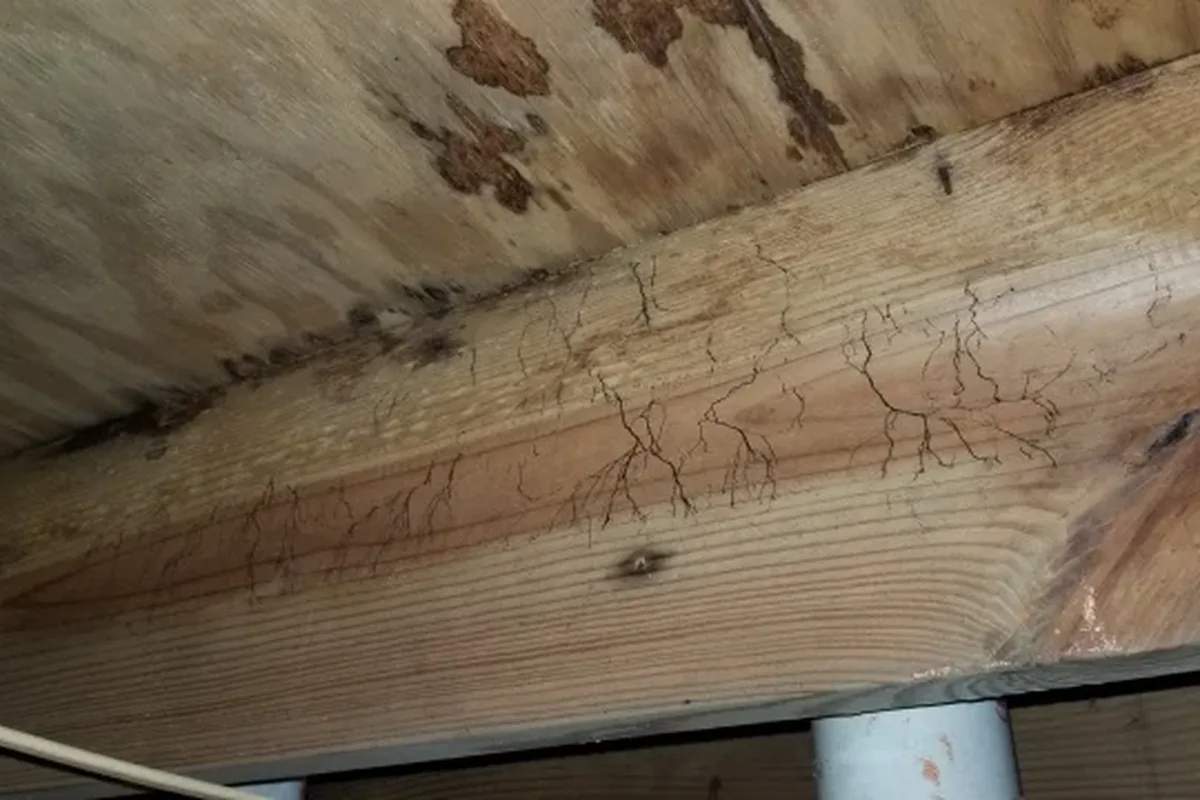
- Existing conditions: old insulation, standing water, wood damage, mold, pest evidence, vapor barrier remnants
- Access points and layout: where the liner will need to wrap around piers, how seams will be routed, where the dehumidifier will sit and drain
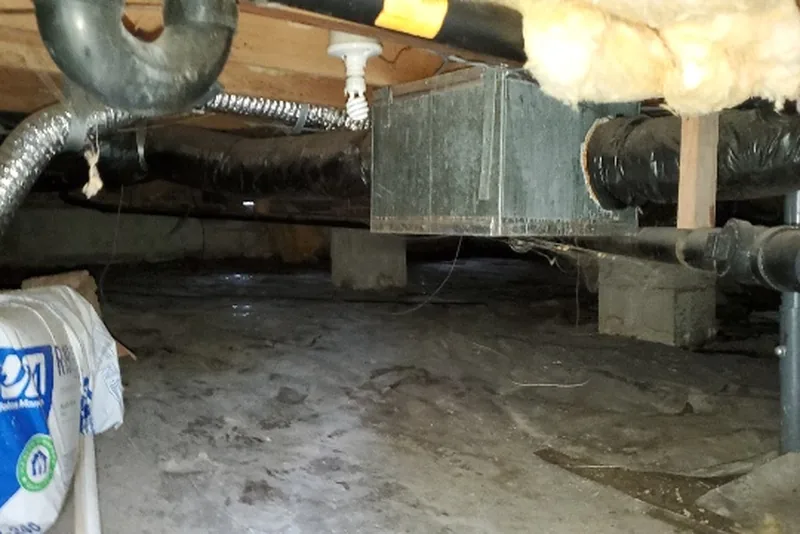
This is also when drainage decisions get made. If the crawl space has a history of standing water or sits on poorly draining Piedmont clay with a high seasonal water table, drainage improvements or a sump pit may be part of the project. Trying to encapsulate a crawl space that floods is like painting over rust; the surface looks treated but the underlying problem continues.
Step 2 — Debris Removal and Old Insulation
The crawl space is cleared before any liner goes in. This typically means removing old insulation that has fallen from the floor joists, degraded poly sheeting from a prior vapor barrier attempt, and any other debris. In older homes in Cary, Raleigh, and Garner, we frequently find fiberglass batts that have absorbed moisture, sagged, and are no longer providing meaningful thermal value, now sitting on the ground contributing to the humidity problem rather than addressing it.
Mold on wood framing, if present and active, is treated before the space is sealed. Sealing a crawl space with active mold growth traps the problem inside and gives it a controlled environment to continue.
Step 3 — Vapor Barrier Installation
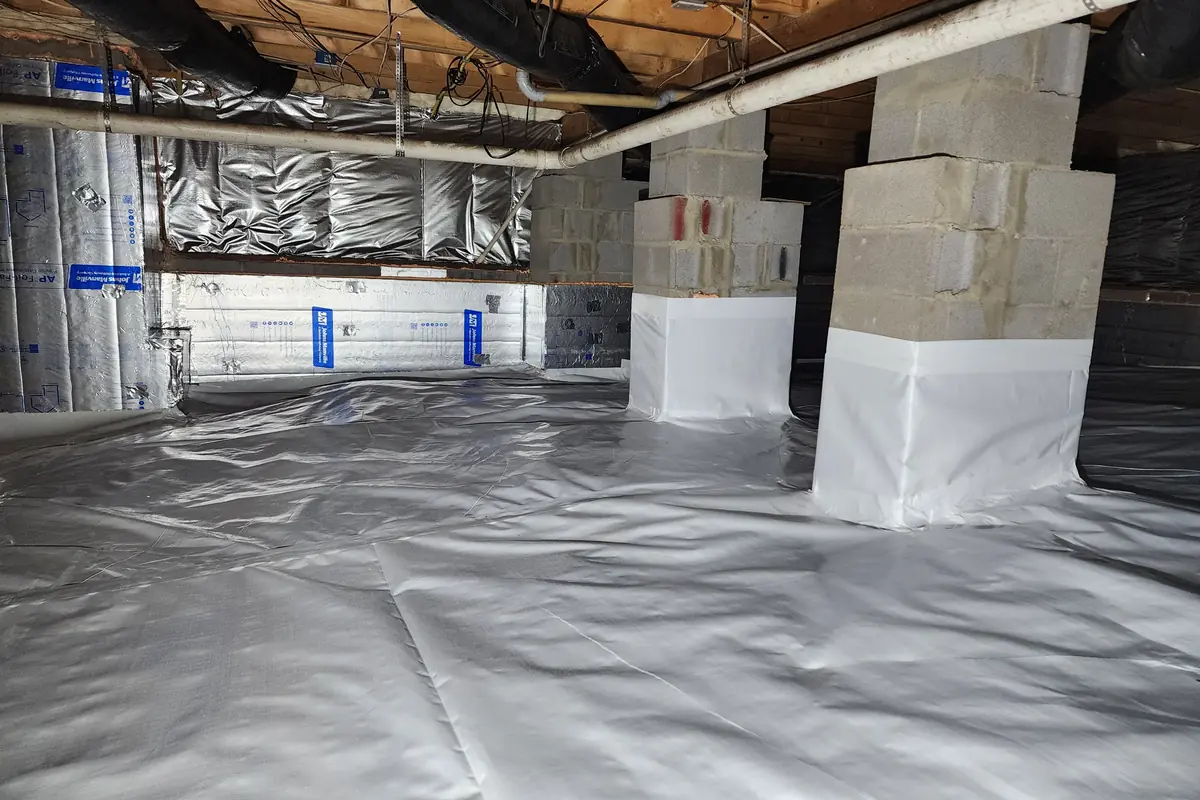
This is the centerpiece of the job. The liner (typically a reinforced polyethylene in the 12–20 mil range) goes over 100% of the crawl space floor and up the foundation walls to the sill plate. Every section matters.
What correct installation looks like:
- Full floor coverage. No bare soil anywhere. Every inch of the floor, including the area immediately against the foundation walls, is covered. Gaps at the perimeter are where moisture enters most aggressively.
- Wall coverage. The liner runs up each foundation wall and terminates at or near the top of the wall, sealed to the concrete or block with adhesive and mechanical fasteners. This captures the moisture that migrates through the concrete itself, not just what comes from the ground.
- Pier wrapping. Each concrete or block pier column is wrapped individually and sealed at the base. Unwrapped piers leave exposed ground contact at every column, a common shortcut that undermines the system.
- Overlapping and taping seams. Where two liner panels meet, the overlap is at minimum 12 inches and the seam is sealed with liner tape rated for long-term adhesion. An unsealed seam is an open moisture pathway.
- Sealing at penetrations. Pipes, support columns, and any other penetrations through the floor are sealed where they pass through the liner.
The liner thickness matters for durability. A 6-mil poly sheet handles a season before tears from foot traffic or shifts in the ground below allow it to fail. In a crawl space that won’t be seen again until there’s a problem, the liner quality determines how long the system performs without attention.
Step 4 — Foundation Vent Sealing
Foundation vents are permanently sealed with rigid foam board, cut to fit each vent opening and secured in place. In North Carolina’s humid climate, these vents function as the primary entry point for the warm, moisture-laden outdoor air that causes summer condensation and crawl space humidity spikes. Closing them is not optional. An encapsulated crawl space with open vents is not encapsulated.
Some homes have a dozen or more vents depending on foundation perimeter and age. Each is measured, fitted, and sealed individually.
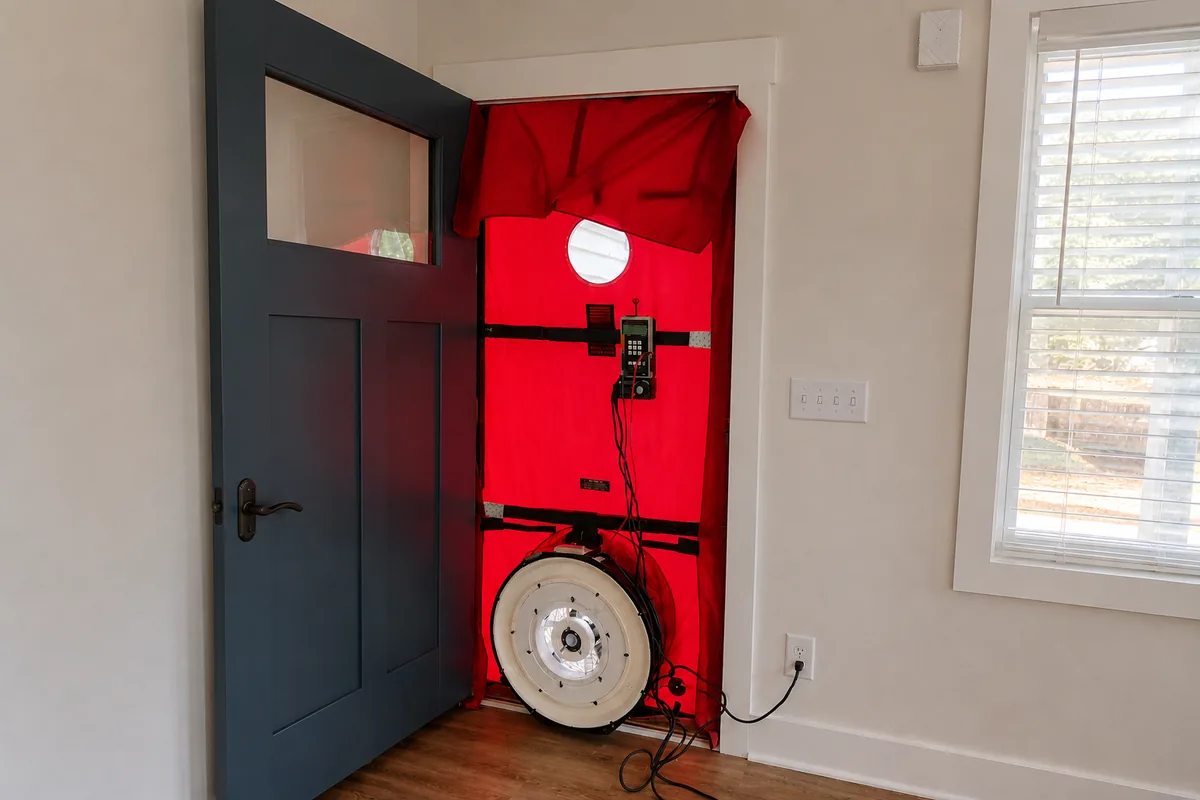
The rim joist (the framing member that runs along the top of the foundation walls and connects the floor system to the foundation) is also air sealed at this stage. The rim joist is one of the highest air-leakage areas in most Triangle homes, and sealing it adds meaningful envelope tightness beyond the crawl space system. This is where Peak Energy’s combination of building science diagnostics and hands-on installation makes a difference: we measure air leakage before and after, so we know whether the sealing delivered the expected performance.
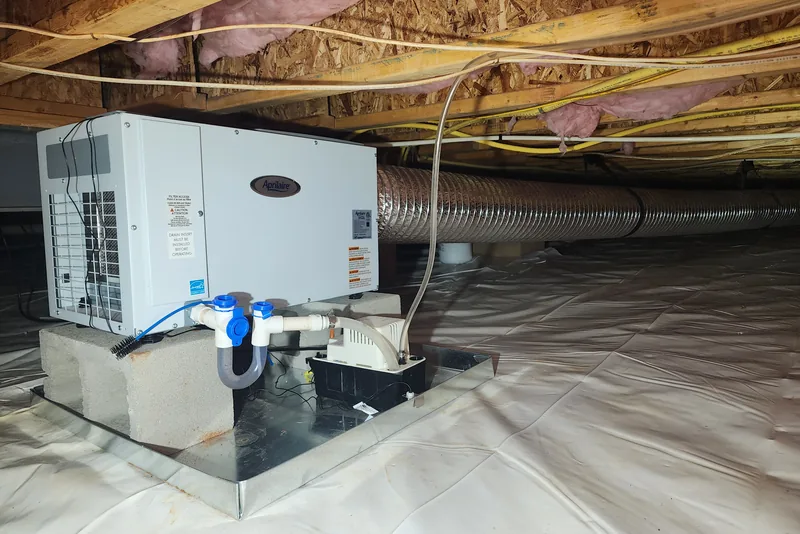
Step 5 — Dehumidifier Installation
With the space sealed and the vapor barrier in place, a commercial dehumidifier is installed and plumbed. The unit is mounted on the vapor barrier with proper clearance, set to a 50–55% RH target, and connected to a condensate drain line.
Where the crawl space grade allows, the condensate line runs by gravity to a sump pit or through the foundation wall to exterior. Where gravity drainage isn’t feasible, a condensate pump handles the lift. The drain line is secured along its run to maintain a continuous downward slope, preventing pooling and backup.
The humidistat is set before the crew leaves. From that point forward, the dehumidifier runs automatically, cycling on when humidity rises above the setpoint and shutting off when it reaches target.
What to Expect on Job Day
Most encapsulation jobs in Wake County take one to two days. A typical 1,200–1,500 sq ft crawl space with normal conditions finishes in a single day. Larger spaces, significant debris removal, mold treatment, or drainage work add time.
The work happens entirely below the living space. You don’t need to leave; the crew accesses the crawl space through the exterior or interior hatch and works independently. You’ll hear some activity, particularly during cleanup and liner installation, but the home stays fully usable throughout.
One practical note: the crawl space access needs to be clear, and the area around the hatch should have enough room to move materials. If the hatch is in a closet, clearing out the floor of that closet ahead of time saves some back-and-forth.
How to Know the Work Was Done Right
A completed encapsulation should be verifiable, not taken on faith. Here’s what to look for when you do a walkthrough:
- Vapor barrier covers the entire floor with no exposed soil
- Liner runs up all foundation walls and is fastened and sealed at the top edge
- All piers are wrapped and sealed at the base
- Every foundation vent is closed with rigid material, not stuffed with insulation
- Seams are overlapped and taped, not just butted together
- Dehumidifier is plugged in, the humidistat is set, and the drain line routes continuously downhill to a discharge point
- No standing water anywhere in the space before closeout
Peak Energy, Inc. in Holly Springs, NC takes a final humidity and temperature reading before the crew leaves and reviews the completed work with the homeowner on-site. There is no written audit report. The findings are discussed and verified in person, which is more useful than a document delivered later.
For homeowners who want to track whether the system is performing over time, energy monitoring provides ongoing visibility into both crawl space conditions and broader home energy use.
FAQ
How long does crawl space encapsulation take?
Most crawl space encapsulation jobs in Wake County take one to two days. A straightforward 1,200–1,500 sq ft crawl space with no standing water or significant mold treatment needed is typically finished in one day. Larger spaces, taller crawl spaces, complex drainage situations, or heavy debris removal add time. You'll get a realistic timeline at the assessment before any work begins.
Do I need to leave my home during crawl space encapsulation?
No. The work takes place entirely below the living space. The crew needs access to the crawl space entry, but works independently and the home stays fully habitable throughout. You may hear activity from the crawl space, particularly during debris removal and liner installation.
Is a vapor barrier the same thing as full encapsulation?
No. A vapor barrier is one component of an encapsulation system. Full encapsulation means the vapor barrier covers 100% of the floor and foundation walls, all foundation vents are permanently sealed, the rim joist is air sealed, and a dehumidifier is installed to manage residual moisture. A vapor barrier without those other steps is partial moisture control. Our crawl space encapsulation service page explains what each approach covers and what it costs.
What should I do to prepare before the crew arrives?
Clear the area around the crawl space access hatch (typically in a closet, hallway floor, or exterior foundation) so the crew can move materials in and out easily. Make sure an exterior electrical outlet is accessible if one is needed for equipment. The crew brings everything else.
Schedule an Assessment
Ready to see what your crawl space actually needs?
Peak Energy provides crawl space assessments across Wake County and the Triangle. We measure humidity, inspect existing conditions, and walk you through exactly what the job would involve, before you commit to anything.
Serving Holly Springs, Fuquay-Varina, Apex, Cary, Raleigh, Garner, and the broader Triangle region.